
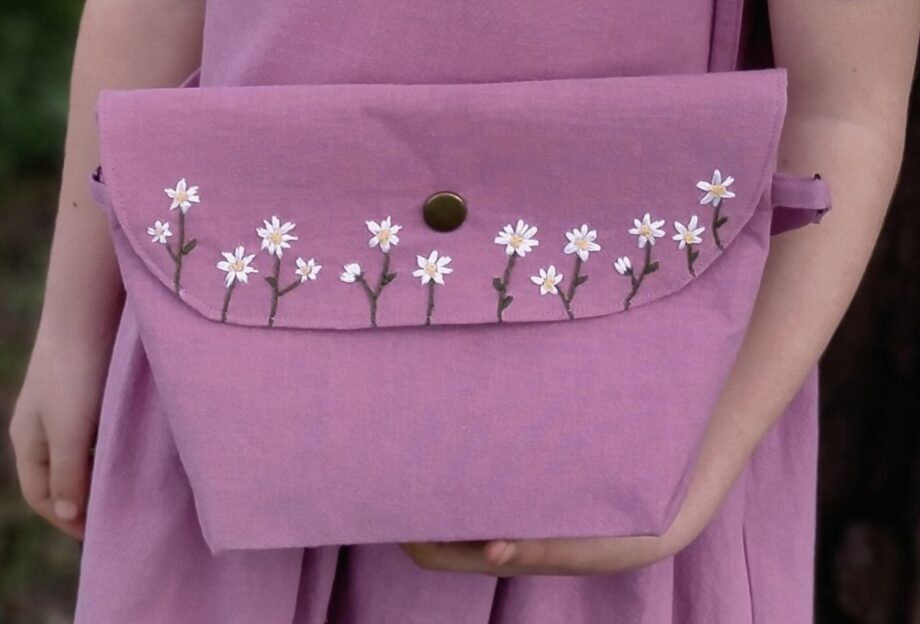
Interested in embellishing your Delta pouch with some fun flower embroidery?! Here’s a FAB tutorial by one of our testers on how to do so!
Tutorial by Annemieke van der Heiden
@Label_madelief
English tutorial
Supplies for your embroidered Delta Pouch:
- Delta Pouch Pattern
- Fabric
- Embroidery design template
- Erasable pen
- Needle (an embroidery needle is recommended)
- Embroidery thread (green, white and yellow)
- Transparent dish (I used a baking dish) and flashlight
- Interfacing
Prepare your embroidered Delta Pouch
- Cut and reinforce the pattern piece you are going to sew the embroidery on.
- Download and print the embroidery design
- Place the transparent dish with a flash light underneath on your table. First place the embroidery design on the dish and then the fabric.
- Draw the design on your fabric with an erasable pen.
Create the flower embroidery
Start: tie the thread with a small knot on the back of your fabric.
Finish: Split the thread in two and tie in a knot.
You can find the explanation of the stitches on the bottom of this blog.
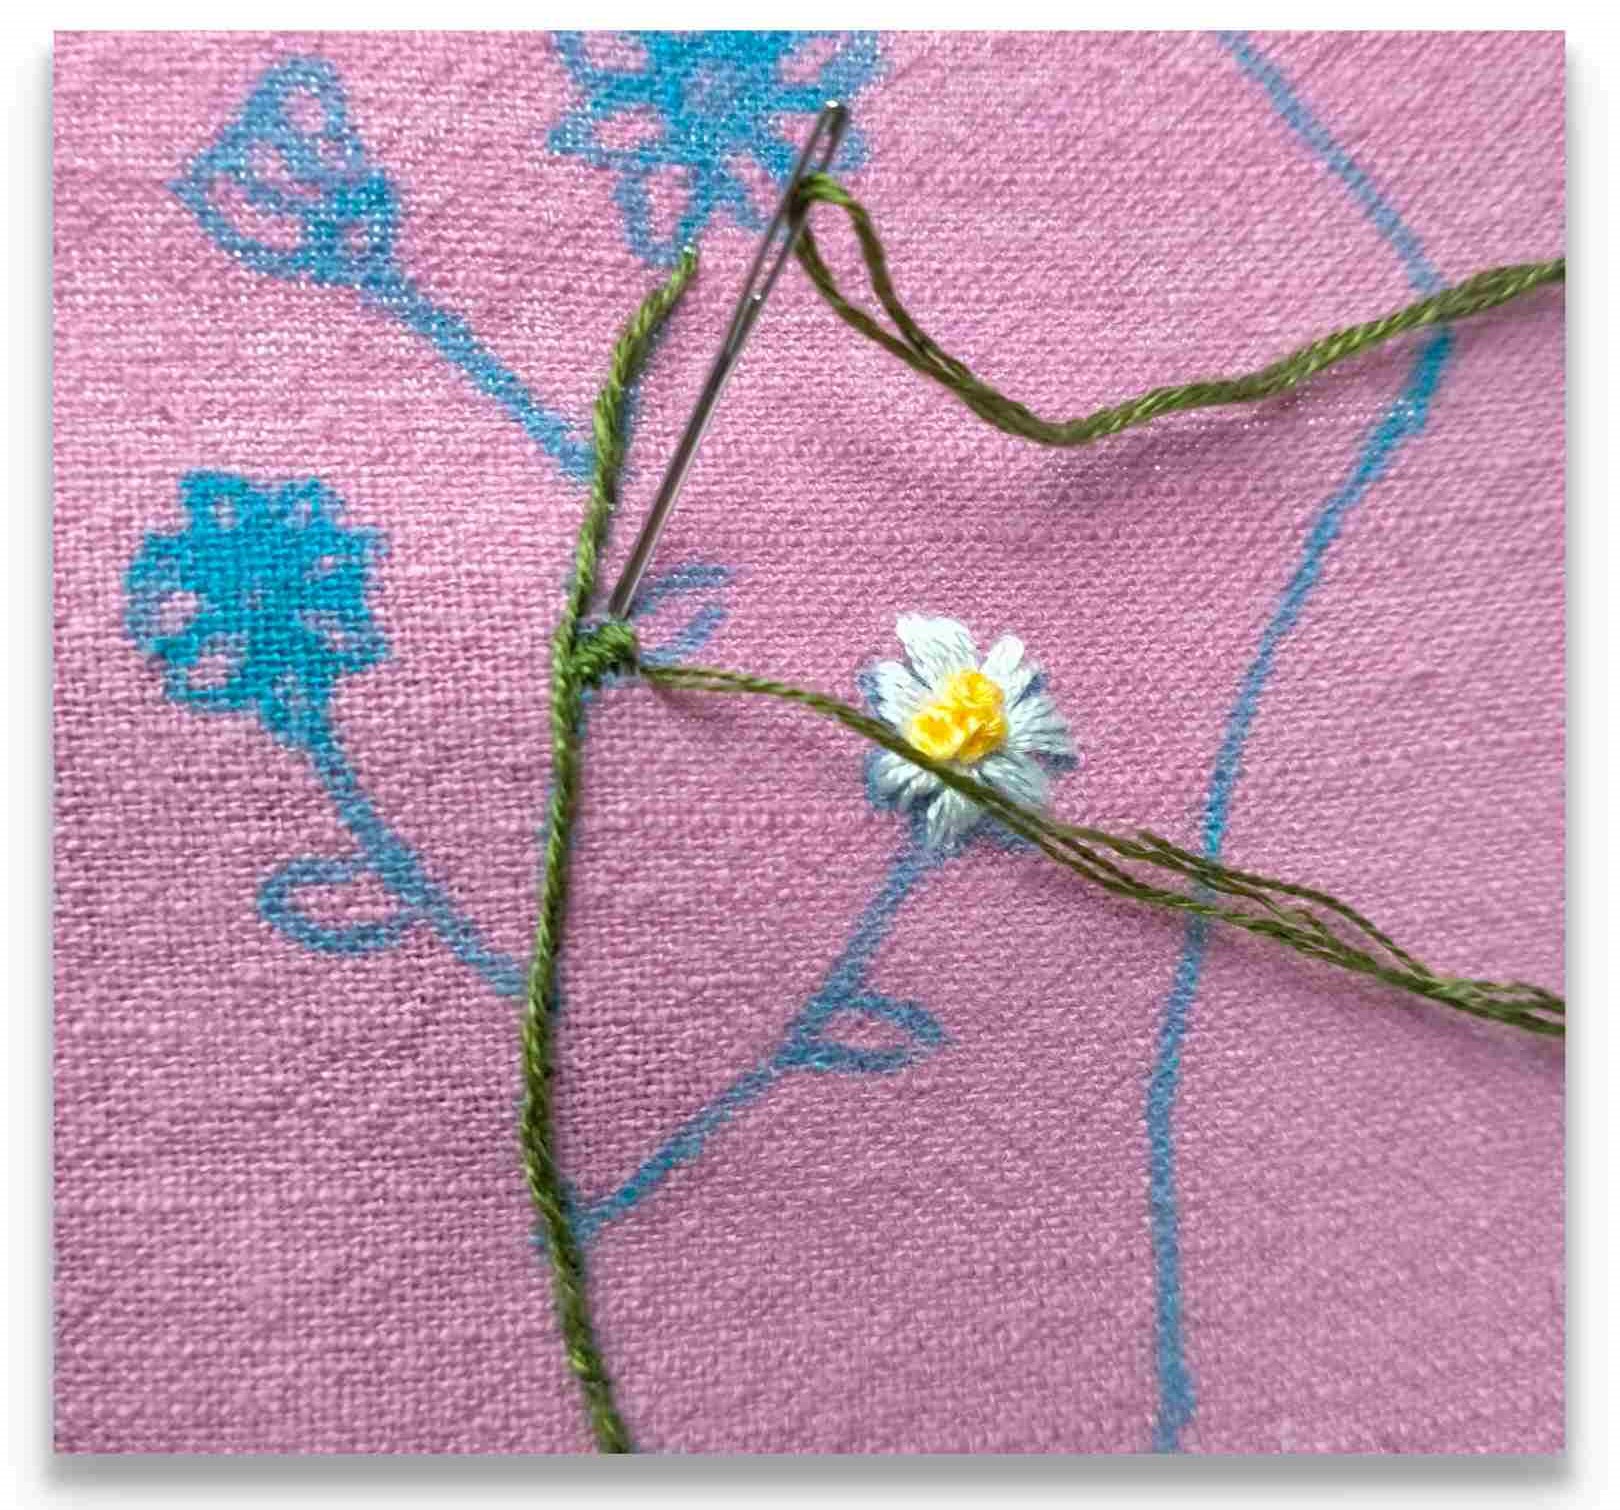
- Stitch with 2 green threads the flower stems using a ‘stem stitch’.
- Stitch with 2 green threads the leaves using a ‘satin stitch’.
- Stitch using 3 white threads the flower petals using a ‘satin stitch’.

- Stitch using 3 yellow dreads the pestle using a ‘French knot’.

- Carefully wash away the erasable pen en dry your fabric
- Sew you pouch according to the tutorial.
I’m really excited to see all of your results. I would really love it if you would show it on Instagram. If you use #metmadeliefborduren I can admire all of your work. Follow @Label_madelief for more inspiration.
General remarks: If you want to stitch on a thin fabric you need to use an embroidery frame. Draw your pattern on the fabric and put in your frame. Make sure it’s not to tight. Your fabric should be straight but not stretched. If you use stretch fabrics you can use “stick ‘n tear” interfacing to prevent stretching.
Nederlands
Benodigdheden voor de Delta Pouch met borduursel
- Delta Pouch Patroon
- Stof
- Borduurontwerp template
- Uitwisbare pen
- Naald (een speciale borduurnaald is aanbevolen)
- Borduurgaren (groen, wit en geel)
- Doorzichtig deksel/bakje (ik gebruikte een ovenschaaldeksel) en zaklamp
- Versteviging
Voorbereidingen voor de geborduurde Delta Pouch
- Knip en verstevig het patroon deel waar je op wil borduren.
- Download het borduurontwerp
- Leg een lamp (zaklamp van je telefoon) op je bureaublad met daaroverheen een doorzichtige deksel/bakje. Leg op het deksel je ontwerp en de stof. Zorg dat het ontwerp precies past binnen de flap van de tas.
- Teken je ontwerp over op de stof met een uitwisbare pen.
Maak het bloemenborduursel
Start: Hecht de draad door middel van een klein knoopje aan.
Einde: Hecht af door de draden te splitsen en maak daar een klein knoopje mee
De uitleg van alle steken kun je aan het einde van deze blog vinden.
- Borduur met 2 groene draden met een ‘stem stitch’ de stelen.
- Borduur met 2 groene draden met een ‘satin stitch’ de blaadjes
- Borduur met 3 witte draden met een ‘satin stitch’ de bloemblaadjes
- Borduur met 3 gele draden met een ‘french knot’ de hartjes
- Was voorzichtig met water de aquamarker weg en laat de stof drogen.
- Naai de tas in elkaar volgens de omschrijving.
Ik ben heel benieuwd naar jullie resultaten! Ik zou het leuk vinden als je jouw resultaat deelt op instagram. Als je de #metmadeliefborduren gebruikt kan ik ze bewonderen. Volg @Label_madelief voor meer inspiratie.
Algemene opmerkingen: Wil je op een dunne stof borduren dan heb je een borduurring nodig. Teken het borduurontwerp op de stof. Span de stof in de borduurring. Zorg dat er niet te veel spanning op de stof staat. Het is goed als er geen holling meer in de stof staat en de stof niet uitgerekt wordt. Voor rekbare stof kun je “stik en trek” versteviging meespannen in de ring om uitrekken te voorkomen.
Explanation of used stitches / Uitleg van gebruikte steken

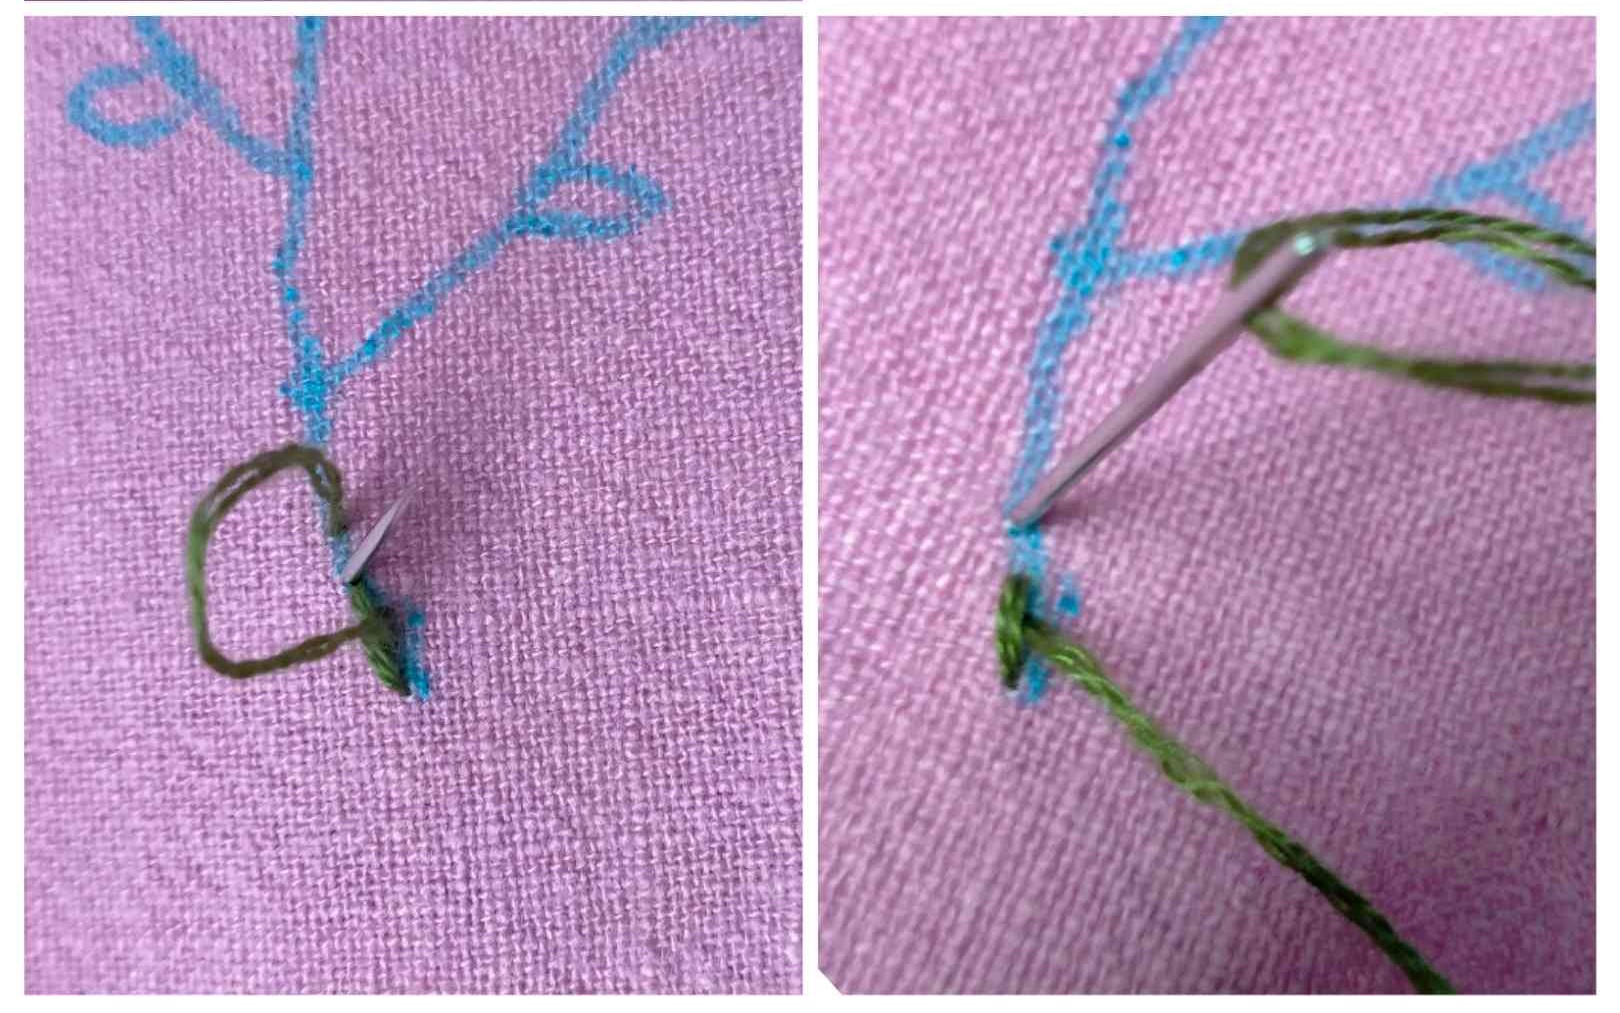
Stem stitch
English:
1. Stitch a regular stitch of 4 mm. Leave a small loop.
2. Start a new stitch in the middle of the loop. Pull the thread carefully.
3. Finish the stitch 2 mm after the last stitch. Leave a small loop.
Repeat step 2 and 3 until the end of the stem.
Nederlands:
1. Maak een gewone steek van 4 mm. Trek de steek niet helemaal aan, maar laat een lusje over.
2. Begin een nieuwe steek in het midden van het lusje. Trek hem voorzichtig aan.
3. Maak de steek 2 mm verder in de stof af. Laat weer een lusje over.
Herhaal stap 2 en 3 tot het einde van het steeltje.
Satin stitch
English:
Is a straight stitch from one side to another. Sew all the stitches straight to each other until the whole section is filled.
Nederlands:
Is een rechte steek van de ene lijn naar de andere lijn. Vervolgens maak je direct ernaast weer een steek. Herhaal dit tot dat je het hele vak hebt gevuld.
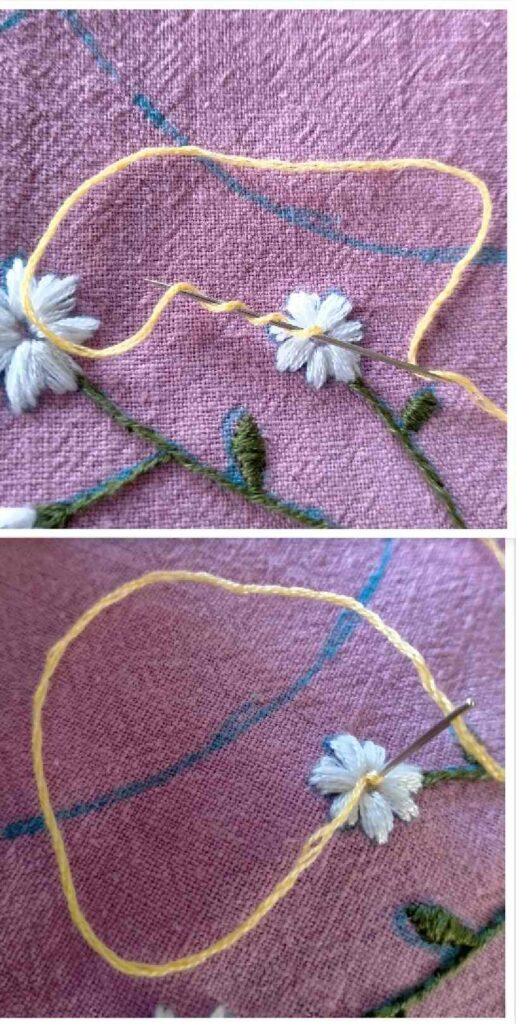
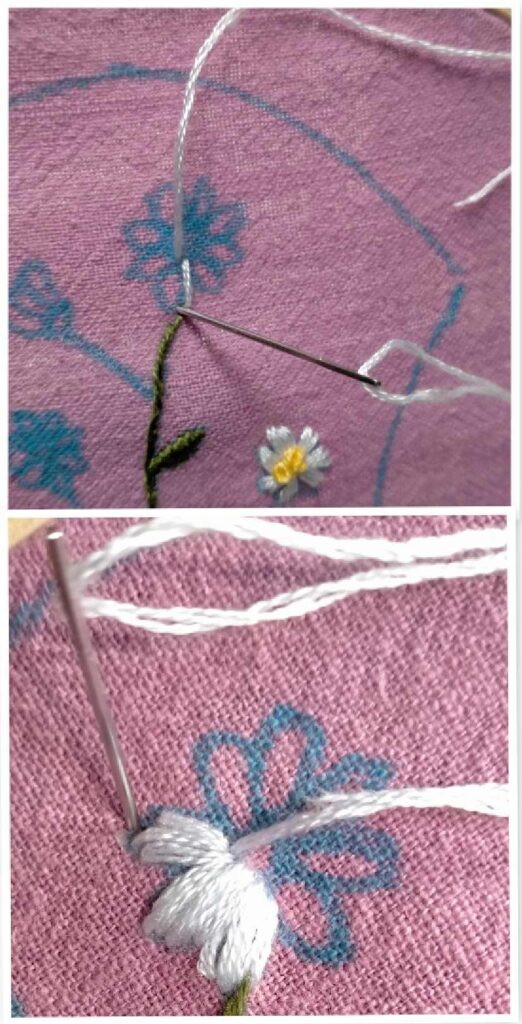
French knot stitch
English:
1. Pull your needle up where you want to start your knot.
2. Wind your thread 2 or 3 times around your needle. You start winding at the eye of your needle toward the point.
3. Stitch your needle through the fabric and pull you needle to the other side. You will see a knot appearing.
Nederlands:
1. Kom naar boven met je naald waar je het knoopje wilt maken.
2. Wikkel de draad 2 of 3 keer om de naald. Je begint met het oog van de naald en draait naar de punt toe.
3. Steek je naald in de stof en trek voorzichtig de naald erdoorheen. Nu ontstaat het knoopje.